Have you ever gazed upon a mythical dragon’s lair in film or literature and wondered what treasure lies within its most prized possession—the egg? Today, that fantasy is brought to life not by magic, but by the mesmerising art of the epoxy resin dragon egg. These captivating creations are more than mere ornaments; they are a breathtaking fusion of modern craft and ancient legend, capturing the imagination of artists and collectors worldwide.
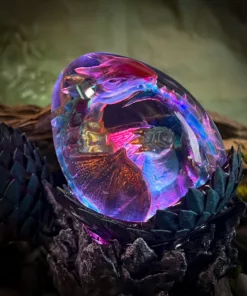
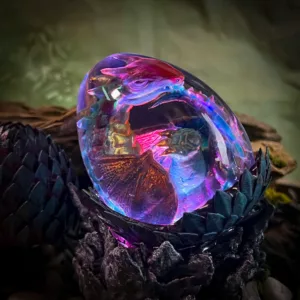
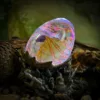
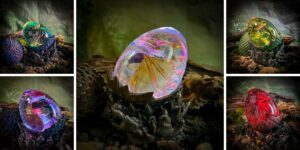
But what exactly makes an epoxy resin dragon egg so utterly captivating? Their appeal lies in the perfect contrast between a crystal-clear, glossy shell and the intricate scene or miniature baby dragonsuspended within. From the glowing, colour-shifting marvels by Grizz Studio, reminiscent of a dragon’s fiery breath, to the stunning landscape eggs by artists like Ben’s Worx that contain entire miniature worlds, this art form has exploded in popularity. This guide will delve into the world of epoxy resin dragon egg art creation, answering all your burning questions. We’ll explore what they are, the materials you need, and provide a step-by-step tutorial on how to craft your very own piece of legend. Ready to embark on this creative quest?
What is an Epoxy Resin Dragon Egg?
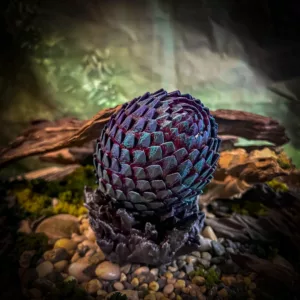
At its core, an epoxy resin dragon egg is a sculptural object crafted using a two-part epoxy resin mixture, poured into a dragon egg-shaped silicone mould. The resin, once cured, becomes a hard, glass-like plastic that is entirely transparent, allowing you to see whatever is encased inside. This is where the magic happens. Artists place a meticulously sculpted or pre-made baby dragon figurine, often made from polymer clay or resin, within the egg. The result is a beautiful, fossilised-like specimen that appears to have been frozen in time.
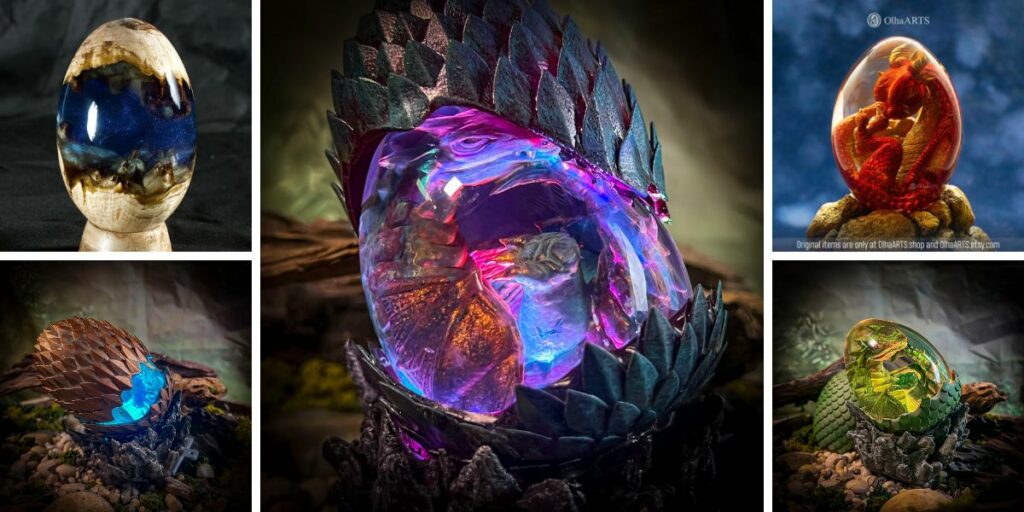
These pieces differ significantly from traditional sculptures. They are not carved from a single block of material but are built in layers, allowing for incredible depth and dimensionality. The variations are endless. You can find simple, elegantly tinted eggs, or incredibly complex pieces like the “Hatchlight” series from Grizz Studio, which feature integrated LED lighting systems (£74-£81, approx. 2.76 x 5.51 inches) that make the egg glow ominously from within. Other artists, like those featured on Reddit, create hybrid eggs using wood burl and resin, or embed glitter and pigments to simulate magical auras or elemental landscapes.

Comparison of Epoxy Resin Dragon Egg Types
| Type | Materials | Key Features | Example Sources |
|---|---|---|---|
| Basic DIY | Silicone mould, epoxy resin, mica powders | Simple single pour, highly customisable colours | YouTube tutorials, Reddit r/resin |
| Glowing Lamp | Resin, LED light kit, remote, rechargeable battery | Colour-changing effects, functions as a night light | Grizz Studio’s Dragonglow products |
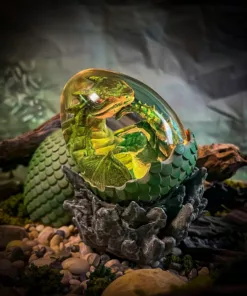
| Landscape Embedded | Wood burl, epoxy resin, flakes, glitter | Contains a miniature diorama or ecosystem | Ben’s Worx sculptures |
| Custom with Baby Dragon | Polymer clay, epoxy resin, paints | Hand-sculpted, highly detailed interior dragon | Various Etsy and Instagram artists |
Materials and Supplies Needed
Before you can begin your epoxy resin dragon egg instructions, you’ll need to gather your arsenal of supplies. The beauty of this craft is that you can start relatively simply without a huge investment.
-
Silicone Mould: This is your most crucial purchase. Thankfully, dragon egg-shaped moulds are widely available on platforms like Amazon and Etsy. Look for a mould with a good, egg-like texture and a secure opening to minimise leakage.
-
Epoxy Resin: Use a clear, 1:1 mixing ratio casting resin. This type is formulated for deeper pours and has excellent clarity with minimal yellowing over time. Brands like ‘Dr Crafty’ or ‘Incredible Solutions’ are popular starter choices.
-
Baby Dragon Figurine: This is your centrepiece! You can find tiny, detailed dragon figurines online, often sold specifically for this craft. For a personal touch, consider sculpting your own from polymer clay.
-
Colourants: Mica powders are the gold standard for colouring resin. They provide vibrant, shimmering colour without affecting the resin’s cure. Alcohol inks can be used for more transparent, tinted effects.
-
Safety Equipment: Non-negotiable. You must have nitrile gloves, a well-ventilated workspace (or a respirator mask rated for organic vapours), and safety goggles.
-
Miscellaneous: Mixing cups, wooden craft sticks for stirring, a heat gun or lighter for popping bubbles, and isopropyl alcohol for cleaning spills.
A basic starter kit can be assembled for under £20, excluding the mould and dragon figurine. Never compromise on safety gear to save money.
-
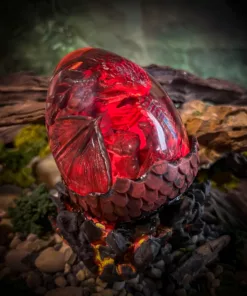
 DragonGlow Devil Hatchlight
£74.00
DragonGlow Devil Hatchlight
£74.00
Step-by-Step Guide: How to Make Your Own Epoxy Resin Dragon Egg
Now for the main event: how to put a dragon in a resin egg. This process requires patience and precision, but the results are immensely rewarding.
-
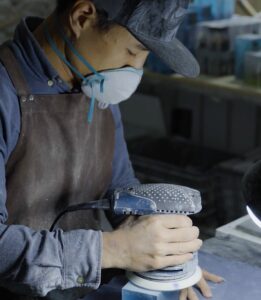
Preparation is Key: Set up your workspace in a well-ventilated area, like a garage with open doors. Lay down a protective covering. Ensure your silicone mould is clean, dry, and placed on a perfectly level surface. Prepare your baby dragon and any other inclusions.
-
Mix the Epoxy Resin: Following your resin’s instructions exactly, measure equal parts resin and hardener (the 1:1 ratio) into a mixing cup. Stir slowly and thoroughly for the recommended time (usually 3-5 minutes), scraping the sides and bottom to ensure it’s completely mixed. Incomplete mixing is the primary cause of a sticky, uncured mess.
-
Add Colour and Effects: Divide your mixed resin into smaller cups if you want multiple colours. Gently stir in your mica powders or alcohol inks. For a magical galaxy effect, you can add a pinch of glitter.
-
The First Pour and Suspension: Pour a thin, clear layer into the bottom of your mould—just enough to cover the base. This will be the “bed” for your dragon. Let this layer sit for 1-2 hours until it becomes tacky (like honey). This tacky stage is crucial for how to put a dragon in a resin eggwithout it sinking or floating. Carefully place your dragon figurine into this layer. For very light objects, you may need a tiny dab of clear-drying glue or UV resin to hold it in place.
-
The Main Pour and Curing: Once your dragon is securely positioned, you can slowly pour the rest of your coloured resin around it. Pour in a thin stream from a height to minimise air bubbles. Use a heat gun or lighter to carefully pass over the surface to pop any bubbles that rise. Cover your piece with a box to prevent dust from settling on it and leave it to cure for a full 24-48 hours, undisturbed.
-
Demoulding: After the full cure time, gently flex your silicone mould to pop the finished epoxy dragon egg out. Congratulations, you’ve successfully hatched your creation!

Sub-Table: Troubleshooting Common Issues
| Issue | Likely Cause | Solution |
|---|---|---|
| Sticky, Uncured Surface | Improper mixing ratio or insufficient stirring | Measure precisely, stir slowly and thoroughly for the full recommended time. |
| Excessive Bubbles | Pouring too quickly, mixing too vigorously | Stir slowly, pour from a height, use a heat gun to pop surface bubbles. |
| Dragon Figurine Sinks/Floats | Pouring on liquid resin instead of tacky resin | Wait for the first layer to reach a honey-like consistency before placing the dragon. |
| Cloudy or Milky Resin | Moisture contamination or rapid temperature change | Ensure all tools are completely dry and work in a climate-controlled space. |
Creative Variations and Inspirations
-
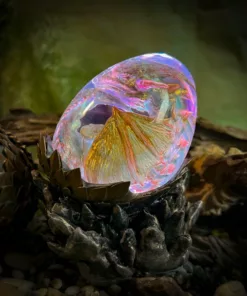
DragonGlow Embryo Hatchlight
£74.00
Your first dragon egg epoxy is just the beginning. The true joy of this craft is in customisation and experimentation.
-
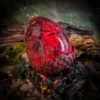
Themed Dragons: Draw inspiration from pop culture. Create a Game of Thrones-inspired egg for Drogon, Rhaegal, or Viserion, using black and red resins. Or craft an icy egg for a Frost Dragon from Skyrim using white mica and blue alcohol inks.
-
Light It Up: Take a page from Grizz Studio’s book and embed a small, battery-powered LED tea light in the base of your mould before pouring. For a more advanced project, look into proper LED kits to create a colour-changing masterpiece.
-
Natural Elements: Use real, hollowed-out eggshells (goose or ostrich) as a natural mould for a uniquely textured shell. Embed dried flowers, moss, or small crystals to create a dragon’s nest or an elemental egg.
-
The Hatching Egg: For a dynamic scene, position your baby dragon as if it is cracking its way out of the shell, using broken pieces of resin or clay around it.
Conclusion and Tips for Success
Creating an epoxy resin dragon egg is a journey into a world where art and fantasy collide. It’s a satisfying process that rewards patience and creativity. Remember to always prioritise safety, work in a clean and level space, and don’t be afraid to experiment with colours and designs. The community of resin artists on platforms like Reddit’s r/resin is incredibly supportive, so share your creations, ask for advice, and be inspired by others. Now, the final question remains: are you ready to hatch your own legendary epoxy resin dragon egg?

The Drogon Sculpture: Game of Thrones’ Fierce Dragon Comes to Life in Stunning Hatchlight
Table of ContentsWhat is an Epoxy Resin Dragon Egg?Materials and Supplies NeededStep-by-Step Guide: How to
Aug
Real Dragon Eggs for Sale: Myth, Magic, and Stunning Replicas
Table of ContentsWhat is an Epoxy Resin Dragon Egg?Materials and Supplies NeededStep-by-Step Guide: How to
Aug

A Dragon’s Victory Over Valhalla: Reviewing Grizz Studio’s Top-Selling T-Shirt Design
Table of ContentsWhat is an Epoxy Resin Dragon Egg?Materials and Supplies NeededStep-by-Step Guide: How to
Apr

The Dragon Ships of the Vikings: A Deeper Meaning Behind the Iconic Symbol
Table of ContentsWhat is an Epoxy Resin Dragon Egg?Materials and Supplies NeededStep-by-Step Guide: How to
Mar